Using the Clip Inspector
In the Inspector  , select the Clip tab to view and edit settings for the selected clip.
Click a clip to select it, and the Clip tab is displayed automatically if the Inspector is visible.
Summary
 ) is selected, you can click the
  to update the clip's properties from the
  below the timeline and choose
 Editing
|
Item |
Description |
|---|---|
|
Click the value and type a new value to trim the beginning of the selected clip to the specified timeline position. For example, if the current Start value is 0.00, typing 10.00 will move the beginning of the clip ten seconds later on the timeline. If ripple mode is enabled, all subsequent clips will ripple automatically. For more information, see "Ripple edits." |
|
|
Click the value and type a new value to trim the end of the selected clip to the specified timeline position. For example, if the current End value is 60.00, typing 50.00 will move the end of the clip ten seconds earlier on the timeline. If ripple mode is enabled, all subsequent clips will ripple automatically. |
|
|
Click the value and type a new value to set the length of the selected clip. The clip's start point remains fixed on the timeline, and the clip's end is modified as needed. If ripple mode is enabled, all subsequent clips will ripple automatically. If you set a clip's length to zero, the clip is deleted from the timeline. |
|
|
Click the value and type a new value to set the start time of the selected clip. Adjusting the clip's source offset slips the clip's media within the clip: use a negative offset to slip the media to the left or use a positive offset to slip the media to the right. For more information, see "Slipping clips." |
|
|
If a clip is not crossfaded with the previous clip, click the value and type a new value to set the amount of time it takes the clip to fade in. If there are no clips on tracks below the selected clip, it will fade in from black. If a clip is on a track below the selected clip, the lower clip will be visible during the fade. Editing this setting also affects the fade envelope on the clip. For more information, see "Clip fades." |
|
|
If a clip is not crossfaded with the previous clip, click the value and type a new value to set the amount of time it takes the clip to fade out. If there are no clips on tracks below the selected clip, it will fade out to black. If a clip is on a track below the selected clip, the lower clip will be visible during the fade. Editing this setting also affects the fade envelope on the clip. For more information, see "Clip fades." |
|
|
Click the value and type a new value or drag the slider to set the opacity of a clip. Double-click the center of the thumb to reset the slider. Using a setting of 1.0, a clip is completely opaque; clips on lower tracks are not visible. As you decrease the setting, a clip becomes more transparent, allowing clips on lower tracks to show through the clip. Editing this setting also affects the fade envelope on the clip. For more information, see "Clip fades." |
|
|
Click the value and type a new value or drag the slider to set the playback rate of a clip. Double-click the center of the thumb to reset the slider. A setting of 1 will play at normal speed, while 0.5 will play at half speed. A setting of 0 will create a freeze-frame effect using the first visible frame of the clip. Each video clip in your project has a specific duration that is not changed by adjusting the playback rate. If you decrease the speed of a ten-second video event to .5, only five seconds of video will be shown. On the other hand, if the speed is increased to 2, the ten seconds of video will play in only five seconds. The remaining five seconds of the clip will be filled either with a freeze of the last frame or with ten additional seconds of video content from the media file (if the source media is longer than the clip). |
|
|
Choose a setting from the drop-down list to choose how audio is stretched when you adjust the playback rate of a clip.
|
|
|
Click the value and type a new value or drag the fader to adjust the volume of each audio channel in the selected clip. Double-click the center of the thumb to reset the fader. Editing this setting also affects the fade envelope on the clip. For more information, see "Clip fades." When adjusting volume, remember to watch your audio meters. Because you are adding the volumes of all of the tracks together, it is easy to clip the audio output. Make sure that the meters never display the red Clip indication during playback. For more information, see "Monitoring audio levels." |
Channel Assignment
Click the speaker icon to turn a channel on  or off
  .
.
Turning off a clip's unused channels allows you to remove those channels from the track list in the timeline.
Click the Mono or Stereo button to indicate whether a channel is a mono channel or part of a stereo pair. Enabling Stereo will pair the channel with the next channel in the list.
If you want to set all of a clip's channels at once, click the Channel Tools button  and choose Set all to mono, Set all to stereo, or Reset.
Type a name in the edit box to identify the channel. For example, you might type Lav1 to identify audio from a lavalier microphone.
Title
When a title clip is selected, you can use the Title controls to control the appearance of your title text. For more information, see "Adding title clips."
Video Effects
When the selected clip has effects applied to it, you can use the Video Effects controls to control the settings for each effect. For more information, see "Adding effects to a clip."
Click the Overlay button  to show or hide a plug-in's interactive overlay controls in the video preview (when available).
Click the Mute button  to bypass a plug-in without removing it from the chain.
Click the Delete button  to remove a plug-in from the chain.
Drag a plug-in's heading to change its position in the plug-in chain.
Click the toggle arrow to show or hide each plug-in's controls.
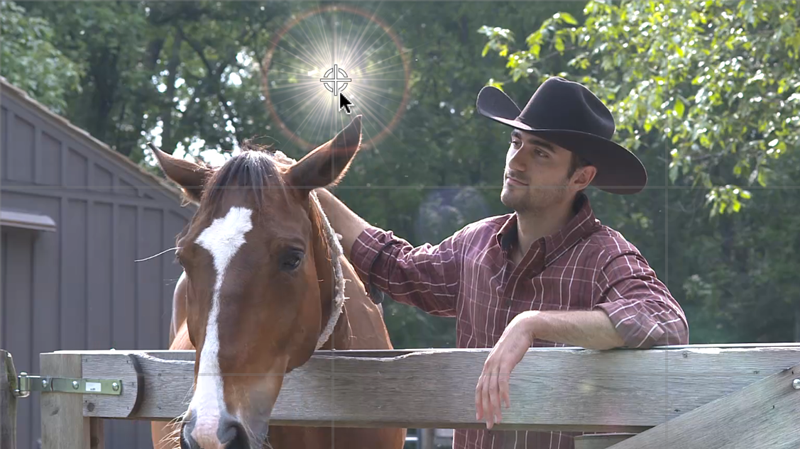
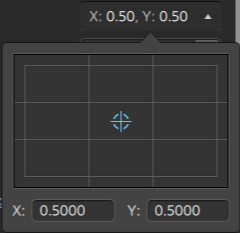
When you select a position parameter in the Inspector, a control point ( ) is displayed in the video preview. You can adjust the parameter's position by dragging the control point in the video preview or the Inspector:
|
|