Working with multichannel audio
Catalyst Edit makes it easy to use your camera audio and incorporate audio from other sources into your project.
-
The Audio and Channel Output controls in the Timeline Inspector allow you to specify the number of audio channels for your project.
-
The Audio controls in the Track Inspector allow you to adjust levels and panning for each channel.
-
The Channel Assignment controls in the Clip Inspector allow you to configure how the clip's audio channels feed the track's audio channels.
Setting up the project timeline audio channels
-
Click the Inspector button
 to show the Inspector window (if it isn't already visible) and click the Timeline tab.
 -
Choose a setting from the Channel setup from the drop-down list to choose whether you're creating a mono, stereo, or multichannel project.
If you choose Multichannel, type a number in the Channel count box to set the number of channels to create a multichannel project.
-
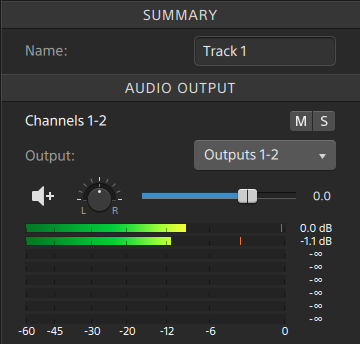
Use the Channel Output controls to set up the timeline's channels.
-
Click the speaker icon to turn a channel on
 or off
  .
.Turning a channel off mutes it during playback and rendering. For example, if you were preparing an eight-channel project with English dialog on channels 1 & 2, French dialog on channels 3 & 4, Spanish dialog on channels 5 & 6, and music on channels 7 & 8, you could turn off dialog channels to preview your project and then turn the channels on when you render your final eight-channel file for delivery. For more information, see "Rendering projects."
-
Click the Mono/Stereo button to indicate whether a channel is a mono channel or part of a stereo pair. Enabling Stereo will pair the channel with the next channel in the list.
-
Type a name in the edit box to identify the channel. For example, you might type Lav1 to identify audio from a lavalier microphone.
Channels that are named identically in the Timeline Inspector and Clip Inspector will be matched.
When you add a clip from a Catalyst Prepare library (
 ) to the Catalyst Edit timeline, any channel assignment settings that you made in the Catalyst Prepare library will be applied to the clip.
For more information, see "Using the Timeline Inspector."
-
Setting up a track's audio channels
-
Click a track header to select the track you want to edit.
-
The track header and the Track Inspector provide controls you can use to mix the track for your project's output.
For more information, see "Adjusting track controls" and "Using the Track Inspector."
-
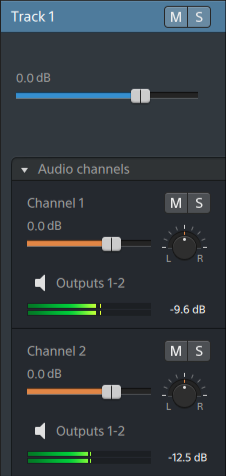
If the Timeline Inspector is set for a mono project, each track will display a blue Volume fader you can use to adjust the overall level of the track and Mute and Solo buttons you can use to mute or solo the track.
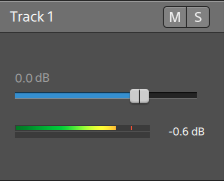
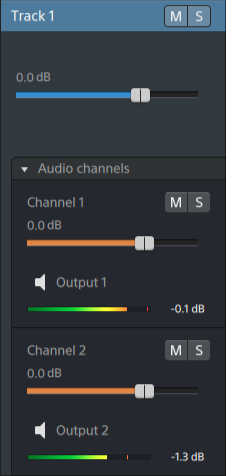
Additionally, if the track contains clips that have multiple channels assigned on the Clip Inspector, each channel provides an orange Volume fader you can use to adjust the channel's contribution to the level of the track and Mute and Solo buttons you can use to mute or solo the channel.

-
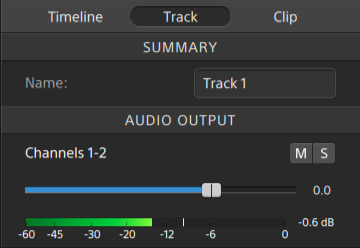
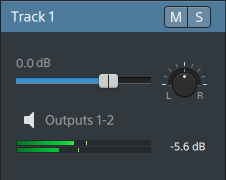
If the Timeline Inspector is set for a stereo project, each track will display a blue Volume fader you can use to adjust the overall level of the track and Mute and Solo buttons you can use to mute or solo the track.
If the timeline outputs are stereo, each track provides a Pan control that you can use to pan the track to the timeline outputs. If the timeline outputs are mono, each track provides an Output control that you can use to assign the track to the timeline outputs.
Additionally, if the track contains clips that have multiple channels assigned on the Clip Inspector, each channel provides an orange Volume fader you can use to adjust the channel's contribution to the level of the track and Mute and Solo buttons you can use to mute or solo the channel.
If the timeline outputs are stereo, each channel provides an orange Pan control that you can use to pan the channel to the timeline outputs. If the timeline outputs are mono, each channel provides an Output control that you can use to assign the channel to the timeline outputs.
-
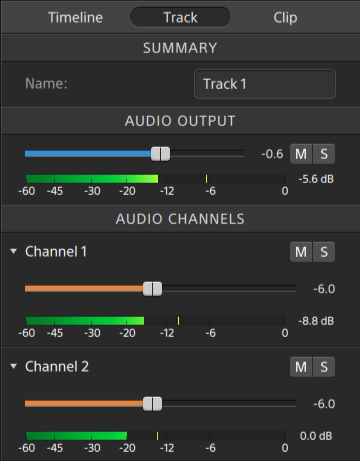
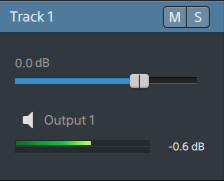
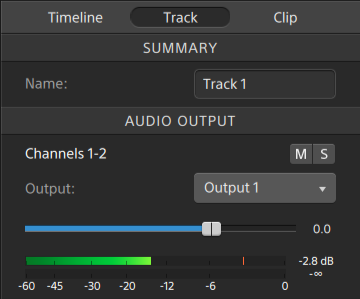
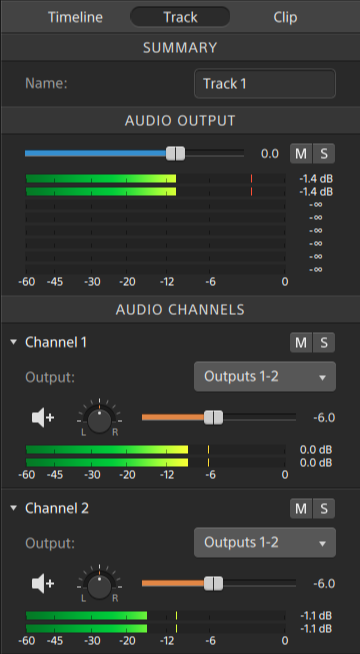
If the Timeline Inspector is set for a multichannel project, each track will display a blue Volume fader you can use to adjust the overall level of the track, Mute and Solo buttons you can use to mute or solo the track, and an Output control that you can use to assign the track to the timeline outputs.
If the timeline outputs are stereo, each track provides a Pan control that you can use to pan the track to the timeline outputs.
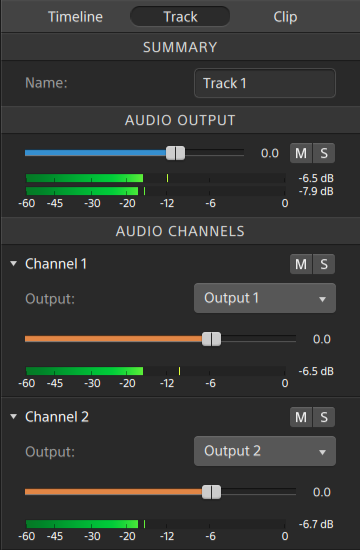
Additionally, if the track contains clips that have multiple channels assigned on the Clip Inspector, each channel provides an orange Volume fader you can use to adjust the channel's contribution to the level of the track, Mute and Solo buttons you can use to mute or solo the channel, and an Output control that you can use to assign the channel to the timeline outputs.
If the timeline outputs are stereo, each channel provides an orange Pan control that you can use to pan the channel to the timeline outputs.
When adjusting volume, remember to watch your audio meters. Because you are adding the volumes of all of the tracks together, it is easy to clip the audio output. Make sure that the meters never display the red Clip indication during playback. For more information, see "Monitoring audio levels."
The meters in the Track Inspector show audio levels for the selected track and each of the channels that contributes to the track.
The meter in the activity pane at the top of the Catalyst Edit window shows the sum of all audio at the cursor position.
-
Assigning a clip's audio channels
-
Select the clip you want to edit. For more information, see "Selecting clips and positioning the cursor."
-
Click the Inspector button
to show the Inspector window (if it isn't already visible) and click the Clip tab. -
Use the controls in the Channel Assignment section to set up the clip's audio:
-
Click the speaker icon to turn a channel on
or off .Each channel will be displayed in a separate lane in the timeline.
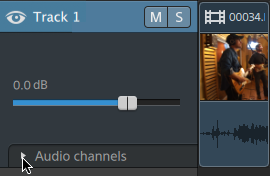
Click to expand the track's channels.
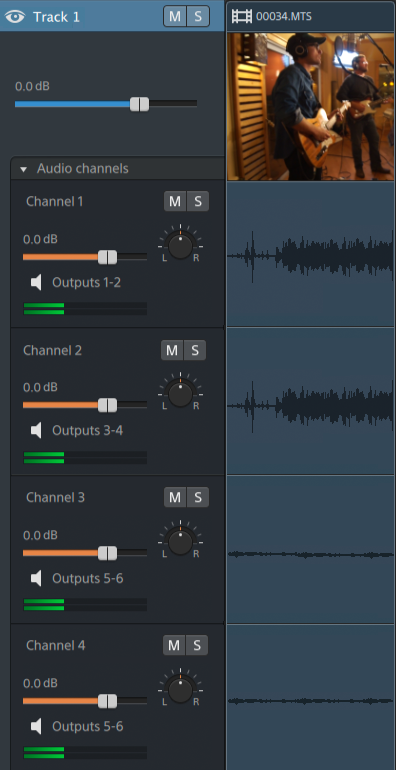
-
Click the Mono/Stereo button to indicate whether a channel is a mono channel or part of a stereo pair. Enabling Stereo will pair the channel with the next channel in the list.
Mono channels will not display a Pan control in the track header. For more information, see "Adjusting track controls."
-
Type a name in the edit box to identify the channel. For example, you might type Lav1 to identify audio from a lavalier microphone.
When multiple clips on a track use the same channel names, those channels will be matched.
The channels that you assign on the Clip tab will be available on the Track tab.
-