Finding media
Organize mode allows you to browse your computer for media files that you want to add to your media libraries, organize the clips in your media libraries, export clips to additional volumes or devices, and transcode files.
For more information, see "Adding media to a library" or "Organizing media in a library."
An  on a thumbnail indicates that an error was detected with the clip.
A  indicates a clip from an Optical Disc Archive volume.
An ![]() on a thumbnail indicates a clip that contains LUT metadata. For more information, see "Editing Color Adjustments controls."
on a thumbnail indicates a clip that contains LUT metadata. For more information, see "Editing Color Adjustments controls."
An ![]() on a thumbnail indicates a clip that contains lens breathing metadata. For more information, see "Lens breathing compensation."
on a thumbnail indicates a clip that contains lens breathing metadata. For more information, see "Lens breathing compensation."
An ![]() on a thumbnail indicates a clip that contains stabilization metadata. For more information, see "Stabilizing clips."
on a thumbnail indicates a clip that contains stabilization metadata. For more information, see "Stabilizing clips."
The stabilize icon is not displayed for clips on FTP devices, XDCAM Station volumes via CIFS, XDCAM decks, XDCAM Drive units, or Optical Disc Archive volumes.
An ![]() on a thumbnail indicates a rotated clip. For more information, see "Working with rotated clips."
on a thumbnail indicates a rotated clip. For more information, see "Working with rotated clips."
An ![]() on a thumbnail indicates that a clip spans multiple discs on an Optical Disc Archive volume. When you play a clip that spans discs, an indicator is displayed in the timeline to identify the point where the clip switches discs:
on a thumbnail indicates that a clip spans multiple discs on an Optical Disc Archive volume. When you play a clip that spans discs, an indicator is displayed in the timeline to identify the point where the clip switches discs:
An ![]() on a thumbnail indicates a clip that spans multiple files due to file-size limitations but is displayed in Catalyst Prepare as a single virtual clip. Spanned XDCAM EX clips can be transcoded directly, but AVCHD clips must be copied first.
on a thumbnail indicates a clip that spans multiple files due to file-size limitations but is displayed in Catalyst Prepare as a single virtual clip. Spanned XDCAM EX clips can be transcoded directly, but AVCHD clips must be copied first.
To transcode spanned AVCHD clips, first copy them to a new folder. After the copy is complete, the ![]() indicator is removed, and the clips are combined in a new clip that you can transcode. For more information, see "Exporting media from a library" or "Exporting media from a library."
indicator is removed, and the clips are combined in a new clip that you can transcode. For more information, see "Exporting media from a library" or "Exporting media from a library."
An ![]() on a thumbnail indicates a proxy clip that does not have a full-resolution clip available.
on a thumbnail indicates a proxy clip that does not have a full-resolution clip available.
Clip lists and spanned clips are not supported in Catalyst Prepare libraries.
Connect to a device via FTP
You can use Catalyst Prepare to work with clips on a remote server using FTP/FTPS in much the same way you work with clips on your computer's drives.
For more information, see " Working with FTP devices."
Format a USB drive for PZW-4000
Select a USB drive in the Devices tab, click the Tools button  , and choose Format for PZW-4000 from the menu.
If the drive you want to format is not displayed in the Devices tab, you may need to format it using your computer's operating system first.
After formatting the drive, the drive will be treated as read-only media by the PZW-4000. Catalyst Prepare can write to the drive, and the PZW-4000 can import clips to its internal drive.
If you want to create the XDROOT folder on a formatted drive, select a USB drive in Organize mode, click the Tools button, and choose Create XDROOT folder from the menu.
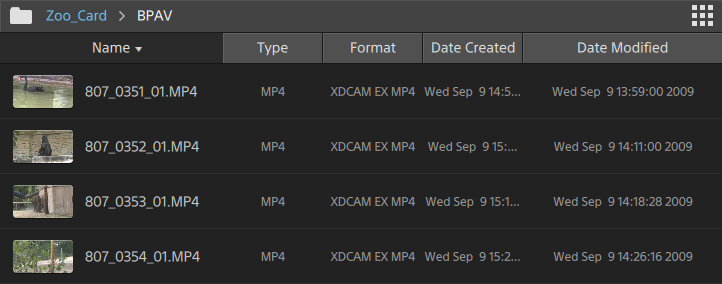
Displaying files in a list or thumbnail mode
Click the button to toggle thumbnail  and list
  mode.
mode.
In )
In list mode)
Searching for clips
-
Select the folder you want to search. Subfolders will be included in your search.
-
Click the Search button
 to display the Search bar at the top of the Media Browser.
 -
Type your search terms in the Search bar. The Media Browser displays all clips in the selected folder that contain your search terms in the file name or Summary metadata.
Select a clip and click Go to folder
 to navigate to a clip's folder.
Click the Close button
 to close the Search bar and clear the search results from the Media Browser.
Select a different folder to clear your search terms and start a new search in the selected folder.
Filtering clips
You can use the Filter button  to filter the contents of the Media Browser. You can filter files by file type, file format, date created, or flag metadata.
-
Select the folder you want to view.
-
Click the Filter button
to display the Filter By menu at the top of the Media Browser.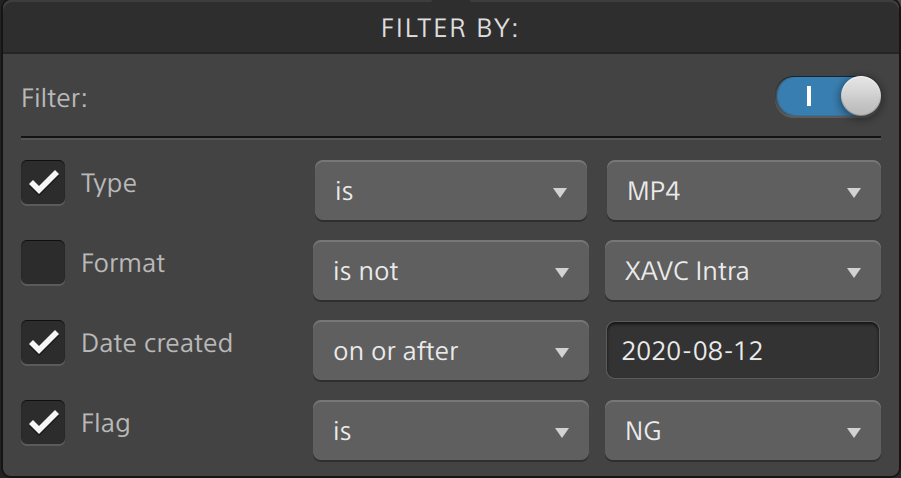
-
Enable the Filter switch at the top of the menu to enable the filter.
-
Select the check box for each filter you want to apply.
For the Type, Format, and Flag filters, you can choose is or is not to indicate whether files that match the filter should be included or excluded from the Media Browser.
For the Date Created filter, you can choose to display files created on or before a date, on or after a date, or between two dates.
To turn off the filter and display all files in the Media Browser, turn off the Filter switch at the top of the menu.
Using filtering, you can quickly find and select clips that you had tagged OK during shooting and copy or transcode the filtered clips. For more information, see "Transcoding clips" or "Copying clips to a device."
Selecting files
-
Click a file to select it.
-
Hold Shift and click the first and last file you want to select to select a range of files.
-
Hold Ctrl (Windows) or Command (macOS) to select multiple files.
Click the Select button
 to select multiple files without using keyboard modifiers.

Showing source clips
-
Select a file.
-
Click the

Managing SxS and Professional Disc volumes
If you need to format an SxS card, please use the Memory Media Utility.
If you need to format or finalize an XDCAM Professional Disc volume, please use the XDCAM Drive Software.